Tutorial cara install LEMP (Linux, Nginx, MySQL, PHP) di Linux CentOS 6. Pilihan panduan LEMP server untuk OS versi lain juga tersedia, diantaranya:
Langkah-langkah install LEMP server di Linux CentOS 6
1. Tambahkan repository EPEL
Pertama tambahkan repo dari epel. silahkan diubahsuaikan dengan versi Linux CentOS yang digunakan:
RHEL/CentOS 6 32-Bit
wget http://d0wnl0ad.fedoraproject.org/pub/epel/6/i386/epel-release-6-8.noarch.rpm
rpm -ivh epel-release-6-8.noarch.rpm
RHEL/CentOS 6 64-Bit
wget http://d0wnl0ad.fedoraproject.org/pub/epel/6/x86_64/epel-release-6-8.noarch.rpm
rpm -ivh epel-release-6-8.noarch.rpm
2. Hapus HTTPD
Stop dan hapus dulu paket Apache bawaan CentOS 6, semoga nanti tidak terjadi konflik pada port 80 yang akan dipakai oleh Nginx (Engine-X).
service httpd stop
yum remove httpd
3. Instalasi MySQL
Install MySQL dengan instruksi berikut:
yum -y install mysql mysql-server
chkconfig --levels 235 mysqld on
Start MySQL dengan perintah berikut
service mysqld startmysql_secure_installation
Ketika diminta untuk memasukkan password pertama kali abaikan saja, pribadi tekan Enter.
Kemudian Jika ada pertanyaan menciptakan password pilih Y kemudian enter dan ketik password yang anda inginkan. Pertanyaan selanjutnya jawab dengan Y kemudian Enter hingga instalasi tamat / berhasil:
4. Instalasi PHP
Perintah berikut secara otomatis akan meng-install PHP beserta modul-modul penting yang diharapkan untuk membangun website, menyerupai mengirim email, manipulasi gambar, sistem caching dan-lain-lain.
yum -y install php-fpm php-mysql php-gd php-imap php-ldap php-odbc php-pear php-xml php-xmlrpc php-mbstring php-mcrypt php-mssql php-snmp php-soap php-tidy curl curl-develphp-pecl-apcJalankan perintah berikut agar service php-fpm selalu auto start jikalau mesin direstart.
chkconfig php-fpm --levels 235 on
Edit konfigurasi php.ini
vi /etc/php.ini
Cari line berikut, hilangkan tanda komen # dan ubah valuenya menyerupai berikut:
cgi.fix_pathinfo = 0
date.timezone = Asia/Jakarta
expose_php = Off
5. Instalasi Nginx
yum install nginx -y
chkconfig --levels 235 nginx on
Setelah proses selesai, start Nginx
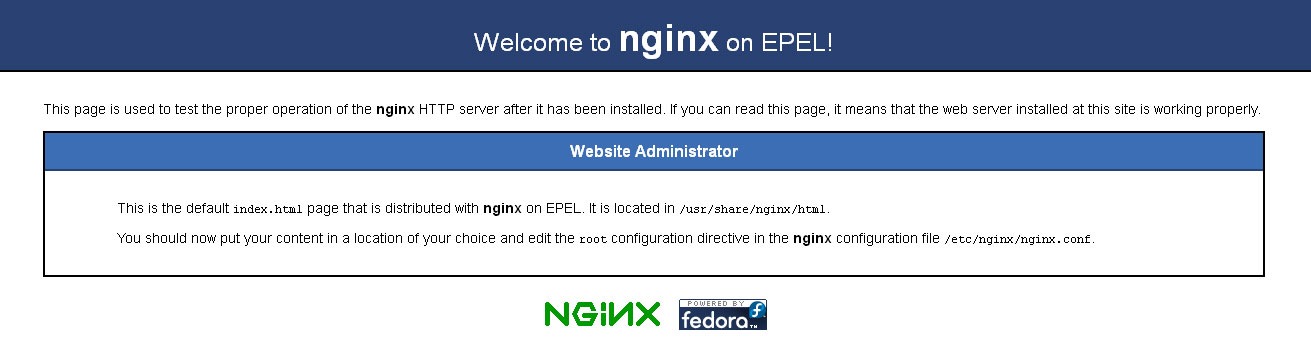
service nginx startBuka browser coba saluran IP server, risikonya kira-kira menyerupai ini
6. Konfigurasi virtual host Nginx
File konfigurasi Nginx yang akan diedit yaitu sebagai berikut
- /etc/nginx/nginx.conf
- /etc/nginx/conf.d/default.conf
- /etc/php-fpm.d/www.conf
Edit konfigurasi Nginx
vi /etc/nginx/nginx.confEdit konfigurasinya, aktifkan gzip atau sesuaikan seperti berikut:
user              nginx;
worker_processes  4;

error_log  /var/log/nginx/error.log warn;
pid        /var/run/nginx.pid;

events {
    worker_connections  1024;
}

http {
    include       /etc/nginx/mime.types;
    default_type  application/octet-stream;

    log_format  main  '$remote_addr - $remote_user [$time_local] "$request" '
                      '$status $body_bytes_sent "$http_referer" '
                      '"$http_user_agent" "$http_x_forwarded_for"';

    access_log  /var/log/nginx/access.log  main;

    sendfile        on;
    #tcp_nopush     on;

    keepalive_timeout  30;

    # Aktifkan kompresi gzip
    gzip on;
    gzip_disable "MSIE [1-6]\.(?!.*SV1)";
    gzip_http_version 1.1;
    gzip_vary on;
    gzip_proxied any;
    gzip_comp_level 6;
    gzip_buffers 16 8k;
    gzip_types text/plain text/css application/json application/x-j4vascript text/xml application/xml application/xml+rss text/j4vascript application/j4vascript text/x-js;

    # Direktori untuk file konfigurasi virtual host
    include /etc/nginx/conf.d/*.conf;

}
Edit virtual host Nginx
echo > /etc/nginx/conf.d/default.conf && vi /etc/nginx/conf.d/default.confBerikutnya, copy-paste teks berikut
server {
listen 80;
server_name idnetter.com;

client_max_body_size 5m;
client_body_timeout 60;

access_log /var/log/nginx/access.log;
error_log /var/log/nginx/error.log error;

root /var/www/html/;
index index.php index.htm index.html;

location / {
        try_files $uri $uri/ /index.php?$args;
}

# Security
error_page 403 = 404;
location   /\. { access_log off; log_not_found off; deny all; }
location    $ { access_log off; log_not_found off; deny all; }

# Disable logging
location = /robots.txt { access_log off; log_not_found off; }
location = /favicon.ico { access_log off; log_not_found off; }

# caches
location  * \.(jpg|jpeg|gif|css|png|js|ico|html)$ { access_log off; expires max; }
location  * \.(woff|svg)$ { access_log off; log_not_found off; expires 30d; }
location  * \.(js)$ { access_log off; log_not_found off; expires 7d; }

# Hapus block ini jikalau Anda tidak menggunakan WordPress
# Start WordPress
location  * wp-admin/includes { deny all; }
location  * wp-includes/theme-compat/ { deny all; }
location  * wp-includes/js/tinymce/langs/.*\.php { deny all; }
location /wp-includes/ { internal; }
location  * ^/wp-content/uploads/.*.(html|htm|shtml|php)$ {
        types { }
        default_type text/plain;
}
# End WordPress

# Hapus jikalau tidak diperlukan
# Start pola URL rewrite Nginx
# Hasilnya: http://idnetter.com/page-2
# rewrite ^/page-([0-9]+)/?$ /index.php?page=$1 last;
# Hasilnya: http://idnetter.com/artikel/sesuatu/
# rewrite ^/artikel/([^/]*)/?$ /artikel.php?q=$1 last;
# rewrite ^/artikel/([^/]*)/page-([0-9]+)/$ /artikel.php?q=$1&page=$2 last;
# End URL rewrite

# PHP
location   \.php?$ {
        try_files $uri =404;
        include fastcgi_params;
        fastcgi_pass unix:/var/run/php5-fpm.sock;
        fastcgi_param SCRIPT_FILENAME $document_root$fastcgi_script_name;
        fastcgi_intercept_errors on;
        fastcgi_split_path_info ^(.+\.php)(.*)$;
        fastcgi_hide_header X-Powered-By;
}
}
Edit file /etc/php-fpm.d/www.conf.
echo > /etc/php-fpm.d/www.conf vi /etc/php-fpm.d/www.confSesuaikan versi PHP, defaultnya dikala install yaitu versi 5
[www]
listen = /var/run/php5-fpm.sock
listen.owner = nginx
listen.group = nginx
listen.mode = 0660
user = nginx
group = nginx
request_slowlog_timeout = 5s
slowlog = /var/log/php-fpm/php5-fpm.log
listen.allowed_clients = 127.0.0.1
pm = dynamic
pm.max_children = 10
pm.start_servers = 3
pm.min_spare_servers = 2
pm.max_spare_servers = 4
pm.max_requests = 400
listen.backlog = -1
pm.status_path = /status
request_terminate_timeout = 120s
rlimit_files = 131072
rlimit_core = unlimited
catch_workers_output = yes
php_value[session.save_handler] = files
php_value[session.save_path] = /var/lib/php/session
php_admin_value[error_log] = /var/log/php-fpm/php5-fpm.log
php_admin_flag[log_errors] = on
Simpan dan keluar dari vim editor Ctrl+C > ketik :wq > tekan Enter
Restart Nginx dan PHP-FPM
service nginx restart && service php-fpm restartBua file info.php
vi /var/www/html/coklat/info.phpIsi dengan instruksi berikut:
<?php phpinfo();Simpan.
Ubah perizinan folder webroot, pada turorial ini sesuai konfigurasi Nginx di atas, berada di /var/www/html/
chown -R nginx:nginx /var/www/html && cd /var/www/html && find . -type d -exec chmod 755 {} \; && find . -type f -exec chmod 644 {} \; && cdBuka http://ip-server dengan browser
7. Tips
Gunakan perintah reload sebagai pengganti restart untuk meminimalisir web server down jikalau Anda memperbarui file konfigurasi Nginx dan PHP-FPM. Contoh,
service nginx reload
service php-fpm reload
Selamat mencoba 😀
Sumber https://idnetter.com
Mari berteman dengan saya
Follow my Instagram _yudha58
0 Response to "Cara Install Lemp Di Centos 6"
Posting Komentar